|
If you prefer to listen, click on the video above! Be kind, this is my first time to read my blog....it is not a strength of mine, but thought perhaps this would be better for some of you who would prefer to listen. In January, I decided I needed a hobby. I think for people who work in education, it is really important to have something that is completely for yourself because we spend most of our days serving others and come home to continue to serve others and I think we miss out on the need to also serve ourselves. But this post isn't about that necessarily....it is about my journey in learning to crochet. I hope that as you read this, you compare my journey to the journey kids have in school and could potentially have in your class as they are learning something new, just like I did. Beginning with the endSo I knew that I wanted to learn to crochet, but why? What was I going to use it for?What did I want to create? How would I know I was successful? First of all, I have an undying obsession with blankets. I love them, I use them constantly, and many hold great meaning to me and I wanted to give that to someone else. My friend was having a baby and I wanted to make something personal, so I decided on making a simple baby blanket. I knew that it was small enough that I would be able to finish, which I'll be honest is a BIG deal. I am well-known for starting and never finishing many of my craft projects (my husband was sure to point this out when I told him about my idea). I also loved this idea, because I knew that I could keep it simple, without forfeiting it's beauty or value. Choosing something complex or that required a lot of time would only frustrate me and cause me to give up before I ever really learned. These two principles really guided my decision on my final product. Collecting ResourcesNow that I knew what I wanted to do, I needed to do a little research on crocheting and find a specific example of what I wanted. I went to my favorite site where all my crafting needs are met, Pinterest. From here it was trial and error, I spent some time typing in different searches, "easy crochet baby blanket", "beginners crochet blanket", "how to crochet for beginners", so on and so forth. I built up some resources on a board that I could refer to as learned. 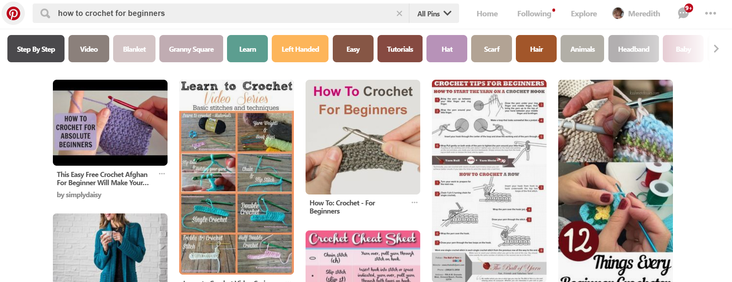 My learning processThe Foundation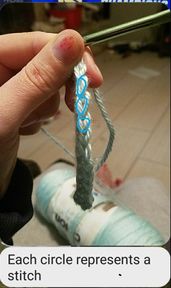 I didn't start right away with the blanket. I started with just trying to learn a basic stitch. So after reviewing my resources, I found that learning the single crochet stitch was the very basic first step. I grabbed a hook, my yarn, and turned on a video....and then when it didn't quite look right, I turned on another video....and this continued through about 4-5 videos until I found one that really spoke to me and made sense. Then I practiced....I probably went about trying this same stitch for about 20-25 mintues. When I thought it looked pretty good, I took a picture of it and sent it to my mom. Apparently, it wasn't really that good. My mom wrote on the picture and showed me where I had messed up. Gave me a smiley face, and told me it was a great try..... I spent another 10-15 minutes correcting my mistakes. Sent my mom a new picture. This time I got it right. So I hung up my yarn and hooks for the evening and decided to come back later and continue practicing. I did just that. The next couple nights I worked on the single crochet stitch. I added a bit to what I learned each night, how to turn and add another line, counting stitches, etc. I continued to send my pics and she continued to help me fix my mistakes. Time to show what I know Here it is!!!!! Such a proud moment to see they used it in their photo shoot. Here it is!!!!! Such a proud moment to see they used it in their photo shoot. After I felt pretty comfortable with what I learned, it was time to show it. I was ready to begin making my blanket. At this time I went back to my resources that I had collected on Pinterest and started sifting through some of the baby blankets I had saved. I ruled out ones that were out of my level. See I hadn't learned some of the more complicated stitches, I couldn't complete those blankets, but I had learned something. So I decided on a simple striped baby blanket, that required me to be able to do the single crochet stitch. To begin the blanket I had to make some decisions, what color or colors, how big did it need to be, what size hook did I need, how thick of yarn did I want to use? So I got out my journal and started to plan. Went to the store and purchased my supplies. Then I started....but it wasn't just like I quickly whipped up this blanket without any issues. I knew how to do a single-crochet stitch, but I wasn't perfect. I crocheted for a few days, got 5-6 lines done...took a picture and sent it to my mom. She told me some areas I could improve, and so as I continued with the blanket, I made sure to correct those things. Then it came time to switch colors. I hadn't learned that....yet! Did I just stop? Did my mom tell me, well Meredith, I guess you just get what you get? No, she pointed me to a few more resources, and I learned how to do a color change. A few weeks went by, and my blanket was finished. Well I thought it was. I was so proud! It was beautiful. I went to visit my mom and brought the blanket with me to show her. She praised me and told me how amazing it was. Then she offered a suggestion, what about a border? It will really help clean it up. She showed me how to complete it and that's what I did. Now, I had something even more amazing and beautiful and I was so excited to give it to my friend for her new baby. Continuing my journey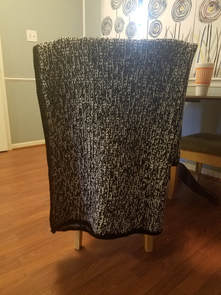 Since then, I have created another afghan, using that same stitch. But this time I used two types of yarn to add more effect. I made it larger and so it required a bit more stamina. I am now currently working on a much more complicated project. It requires me to use different types of stitches and lots of color changes. My foundation and level of confidence has allowed me to try these harder things. I still need scaffolding and help from my mom when videos and books aren't enough but that help isn't needed immediately or as often. I do still need her praise. I still send her pictures of what I've accomplished, and I love to hear how proud of me she is. She is still there to support me. So what does this have to do with the classroom?Absolutely everything. 1. Make it relevant. I didn't learn crochet because someone forced me. Now, I know some subjects that is hard to do...but we must TRY! 2. Choose our tools and resources carefully. In my case, crocheting resources are found easily using Pinterest. That was the right tool for the job. Researching how to crochet on CNN, would have proven much less productive. As teachers, instructional technologist, librarians, academic specialists, etc we need to make sure we are using the right tool. Not any tool will do! It needs to be relevant, easy to use, and enhance the learning. I think we also have to give great time in choosing our resources. Text, videos, images, resources on different levels, are all going to be necessary as our students are not one-size fits all. 3. Provide feedback in a timely and well-constructed manner. I didn't get a grade for my first attempt. My mom didn't tell me how bad it looked. She showed me what went wrong, where I probably messed up, and how to fix it. She did it immediately. She didn't wait a day before answering my text. As teachers for adults or kids, we must find ways to provide feedback in a more timely, efficient, and effective manner. Grades aren't the answer. 4. Meet kids where they are. I was a beginner. My background knowledge was low. I didn't create a blanket that was too hard. I created a blanket that I felt confident I could complete, but not so simplistic, that there wasn't room for more growth. Individualize and differentiate content, projects, assignments as much as you can for your students. Provide them choice so you can meet the needs of your learners where they are. 5. Provide enrichment or reflection at the end of units/projects. I thought my blanket was done. I thought there was nothing else I could do, it was perfect. It wasn't. I could add a border to really enhance what I had already done. Just because a student finishes a project, it doesn't mean that it is complete or without error. Find time to allow for reflection and peer feedback. 6. Build confidence. I felt good about my blanket. I was confident that I could create something even better. With confidence we are willing to take risks. We are willing to try things that we would have found impossible before. Keep that in mind when starting school. Start with something that can build confidence in your students and can carry them throughout the year. 7. Give kids time. I didn't learn to crochet in a day. I tried it one day, needed feedback, tried again over the next few days and got some more feedback. I practiced. I asked questions. I re-watched videos. I browsed through pictures of what others had done. It took me time to decide on a product, how I would make it, what it would look like....I started it, restarted it, and revised it. It takes time! I hope that you were able to find my journey in learning something new relevant to learning in the classroom. I hope that as you continue to learn new things you will keep in mind your own process and apply it in your classroom. As always, would love to hear if you have any other thoughts. Did you get something more than what I mentioned or disagree with a thought? Leave me your comments! 
0 Comments
CollaborationThis month's focus was on collaboration. This was a fun session, lots of movement and discussion. We feel that in a classroom, when collaboration is strong, it will seem a bit noisy and even messy at time, but that's ok! The best we can do as presenters, is to show/model those same situations with our teachers. The PowerPoint presentation that was used is below.
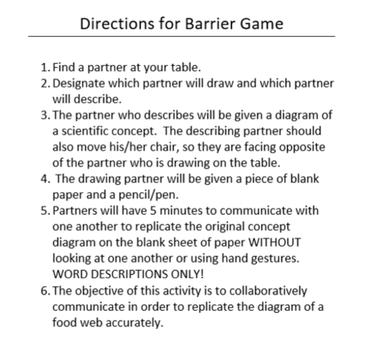
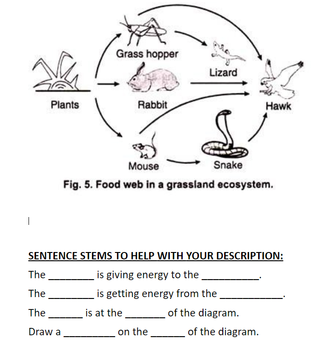
The Warm-upTo get the session started we played a collaborative game for a warm-up. This strategy is called a barrier game. This game is an information gap activity. One learner has the information the other learner needs. Information for this game was found HERE. The directions were pretty simple. One person had an image of a food web. They were to describe the image to their partner, who then in turn try to draw it. I love this strategy because it has great ability to help students learn to communicate academically. They are forced to use vocabulary. They must learn to give clear directions. The other partner is then working on their listening skills, which I think we can all agree is a life-long skill that we can all be better at. Below are the directions that were used and the image, along with sentence stems that were give to one of the partners.
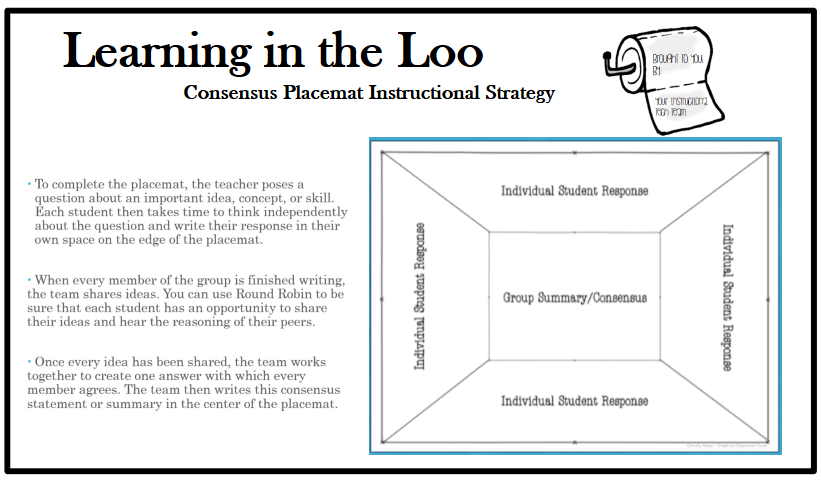
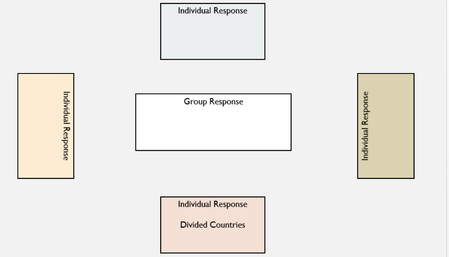
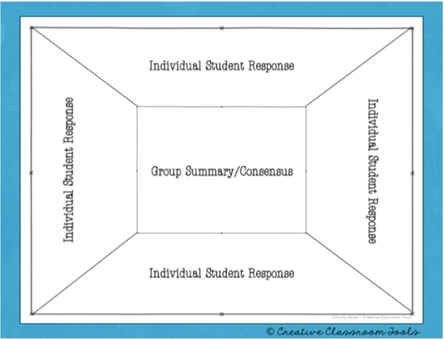
Consensus Placemat StrategyThis amazing strategy was found on Creative Classroom Tools blog. You can find the particular article HERE. Since showing this to teachers, I have used this strategy in multiple other PD sessions and have also heard great responses from our teachers who have tried it out. It is a keeper! So what is consensus placemat? It is a cooperative learning tool that allows students respond independently and then build collaboration with students to come to a consensus answer. Here are a few examples. The one on the left is the is a screenshot from a PowerPoint, if you wanted students to collaborate on a shared PowerPoint document online. Here is an example. The one on the right is from Creative Classroom Tools website.
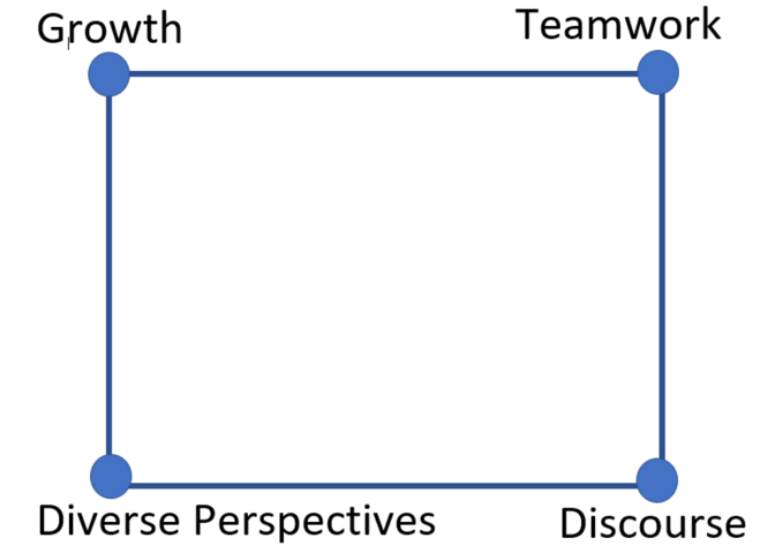
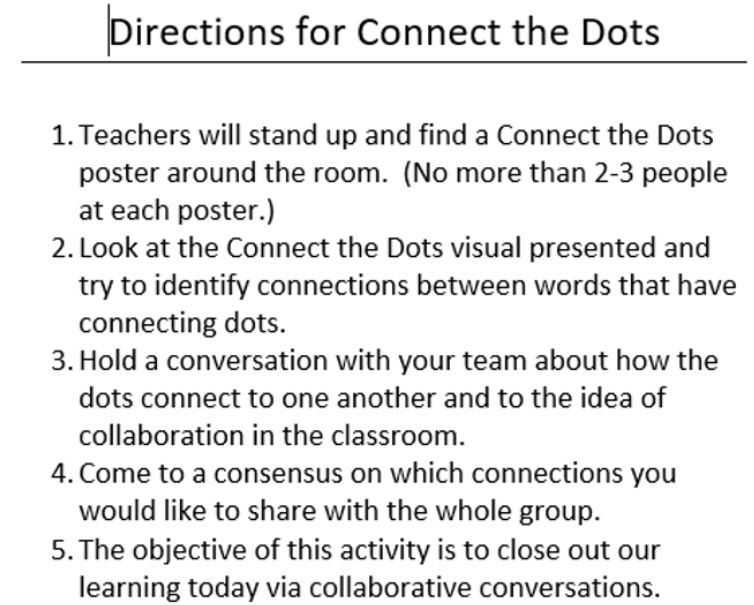
The teacher begins with posing a question. Each student then writes their individual response around the edges. This should be done without collaboration. After each student has had a chance to write a response, then the group comes together to discuss each response. When they are finished they will then come up with a collective responses or consensus to write in the middle. Graphic organizer carousel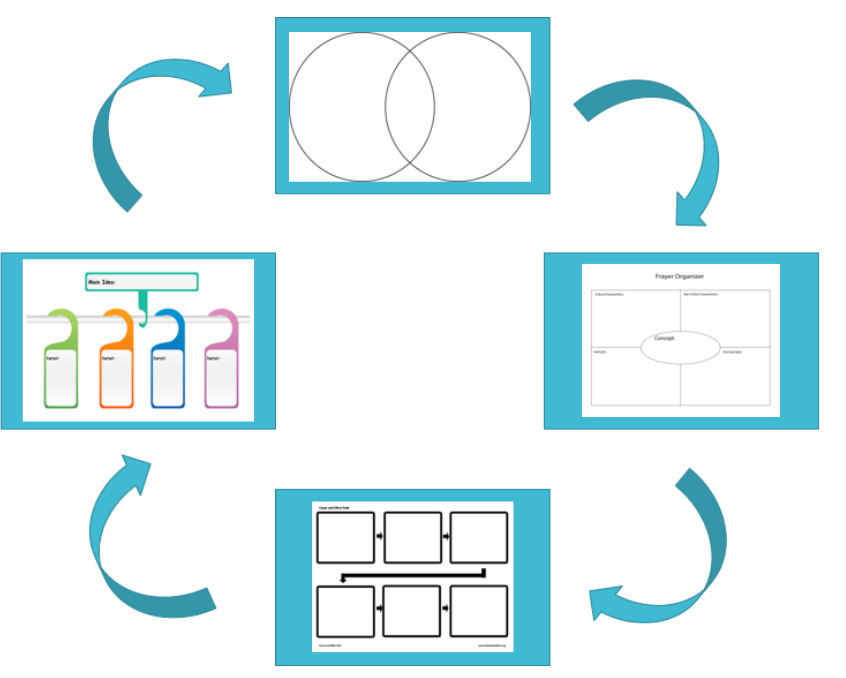 My partner Meghan Alcorn came up with this strategy and I think it is brilliant. We have now used it in multiple high school classes, and the teachers really like it. The first thing to do is gather or create multiple graphic organizers for the speicific content you are working on. Draw the graphic organizers (without the answers) on large sheets of butcher paper and laminate. Then the answers should be printed or written on cards and laminated as well. You can hang the graphic organizers around the room, or you can place them in stations. Randomly pass out the answer cards and tell students to try to find the missing graphic organizer that matches their particular answer. Let me tell you, this isn't as easy as it seems. The results are just what we were looking for: collaboration. We placed multiple graphic organizers around the room about classifying quadrilaterals. Each teacher was given a card, and they had to work together, talk it out, problem solve, and think critically to find where the correct answers went. Another recent example was from our English 2 classes. They were studying To Kill a Mockingbird. So I created 5 graphic organizers that would help them review major content areas for their test. We had organizers for theme, characters, symbols, relationships, and plots. I think the possibilities are endless for all subject matters. Pass the Story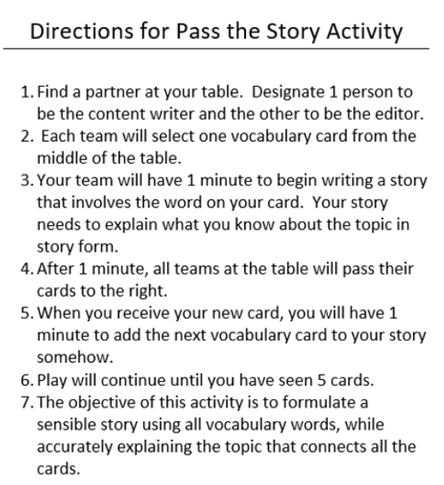 We have seen this collaborative strategy before: each student adds to a part of the story. We made a twist to it by creating vocabulary cards that have to be used in each pass of the story. This helps students stay on topic and helps them with vocabulary acquisition. Here are the directions on the left. In our particular session, we gave groups of teachers vocabulary from an astronomy unit: axis, rotation, solar system, planet, and revolution. Each teacher began writing their story with the vocabulary word given to them. After a minute, they passed their cards to the right and had to add a new sentence with the new vocabulary term. Continue until completing all terms. You could then have students trade and comment on each other's story. The Wrap UpWe used this Connect the Dots strategy to wrap-up our learning for the day. Information for the strategy is from Lead4Ward. You can the information HERE.
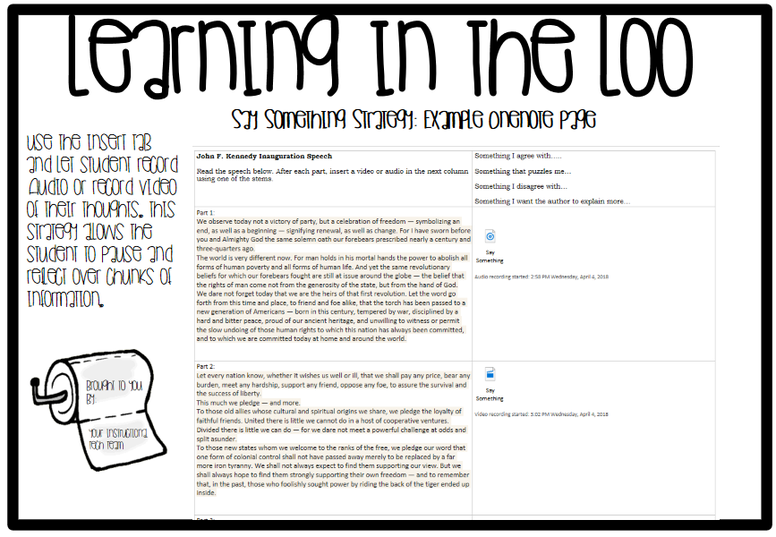
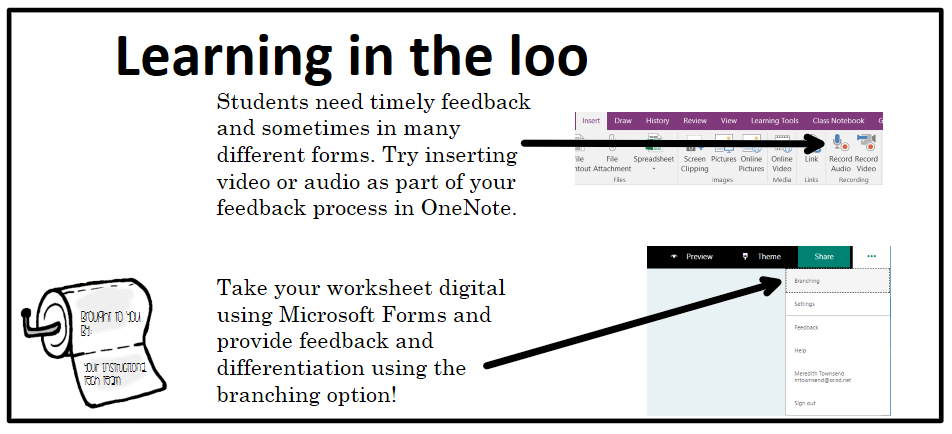
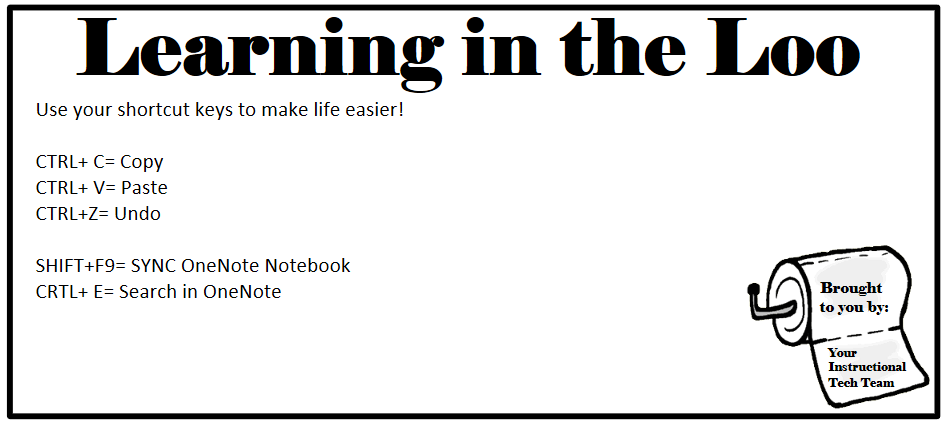
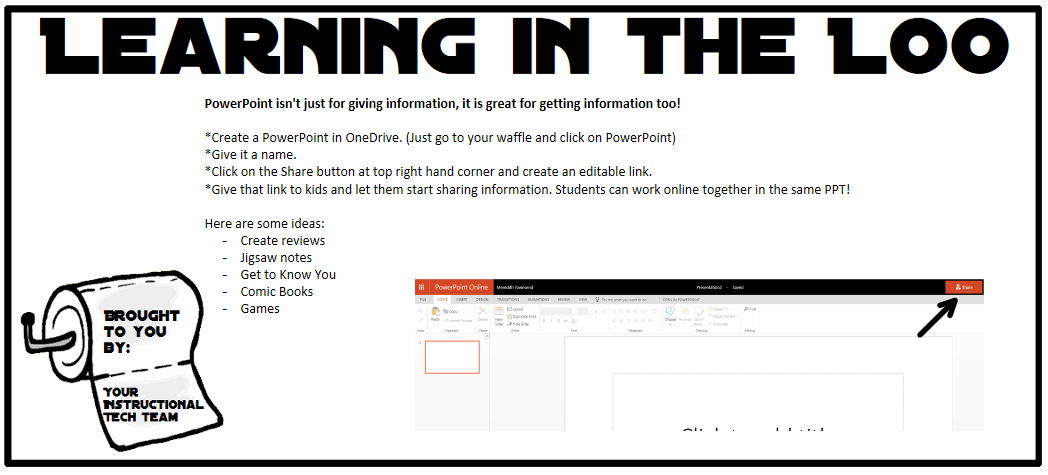
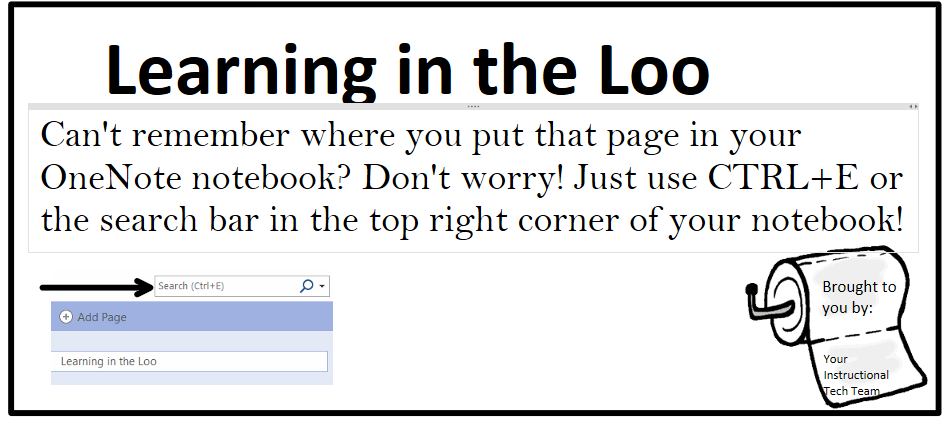
I hope you found some interesting strategies to use for collaboration. Please share them with your colleagues. Let me know what you think!   I love this idea that I got from Kathi Kersznowski. You can follow her at Twitter @kerszi . With so much going on in the year, teachers are swamped and finding time for Professional development is hard!!!! So use that free time in the bathroom for some light reading! Basically you take any subject matter you want your teachers to learn and put it in a nice, neat little package that can be read in about the time it takes to go to the bathroom. I started off the year with basic tech tips for OneNote and Windows. Later on in the year I moved to instructional strategies. Here are my posters. My favorite is the little toilet paper roll detail! 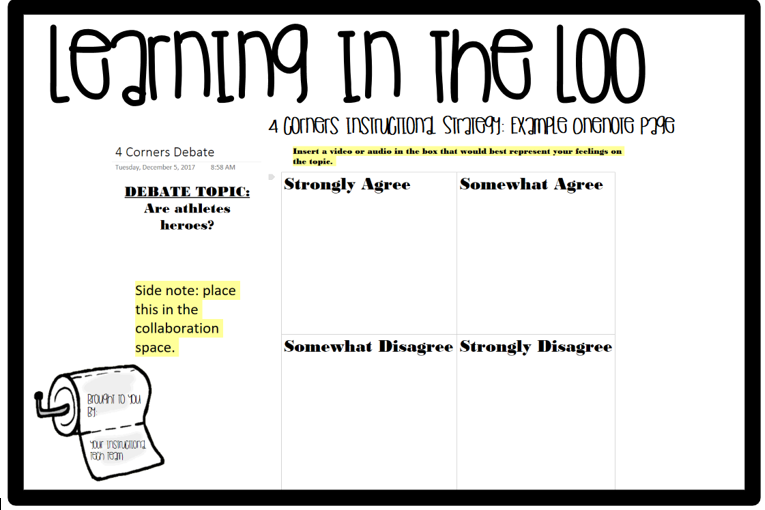
  Hope you liked this quirky, small way of encouraging learning in your school!  October's Focus: Student Choice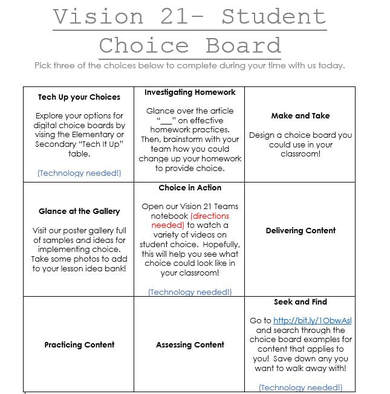 Choice Board Used by Teachers to Guide Their Learning Choice Board Used by Teachers to Guide Their Learning This month we wanted to focus on something that was near and dear to our hearts, and that is providing more choice in the classroom. This could be choice in how student's were delivered content, type of homework assigned, choice in seating, or assessment. We wanted to provide our teachers with a variety of choice as well, and model how it can be handled in a classroom. The teachers were provided with a choice board. They were then given 45 minutes to self-pace through 3 of the 9 choices on their board. Most of our work as presenters was done prior to the meeting. We set up each station, explained to the teachers why we felt student choice was important, and then allowed them time to explore. As always, we did wrap up with time for the teachers to create some lesson plan ideas and share out those ideas before leaving. You will find the short presentation that we used attached below. There are also screenshots of our OneNote pages that are used to create the stations and then saved for those who participate later on.
Choice #1: Homework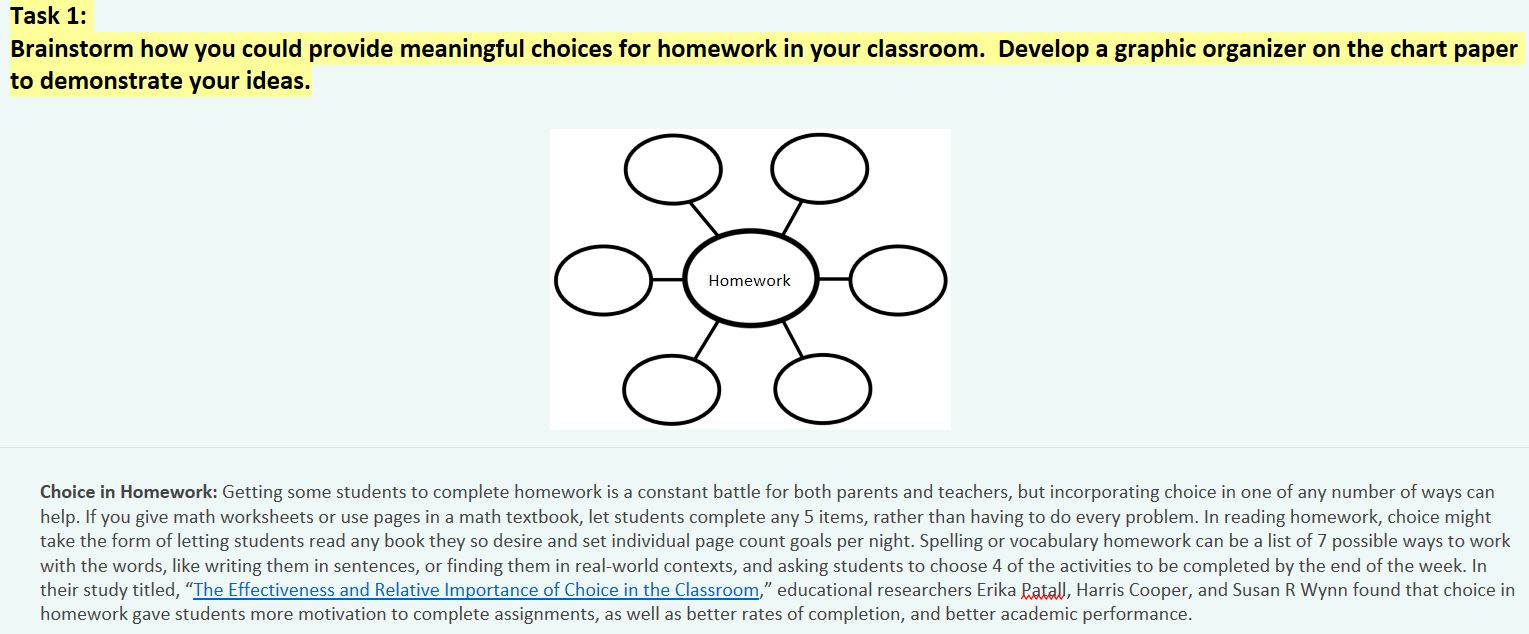
Choice #2: Choice Board Structures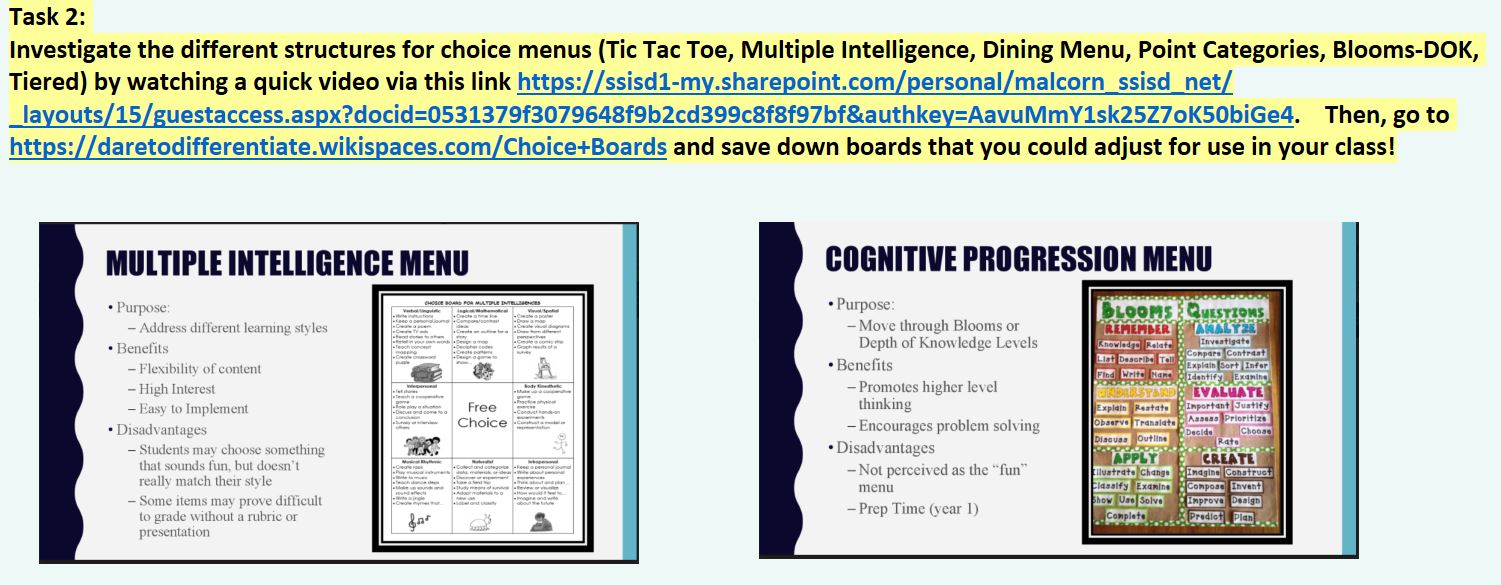
Choice #3: Creating a Digital Choice Board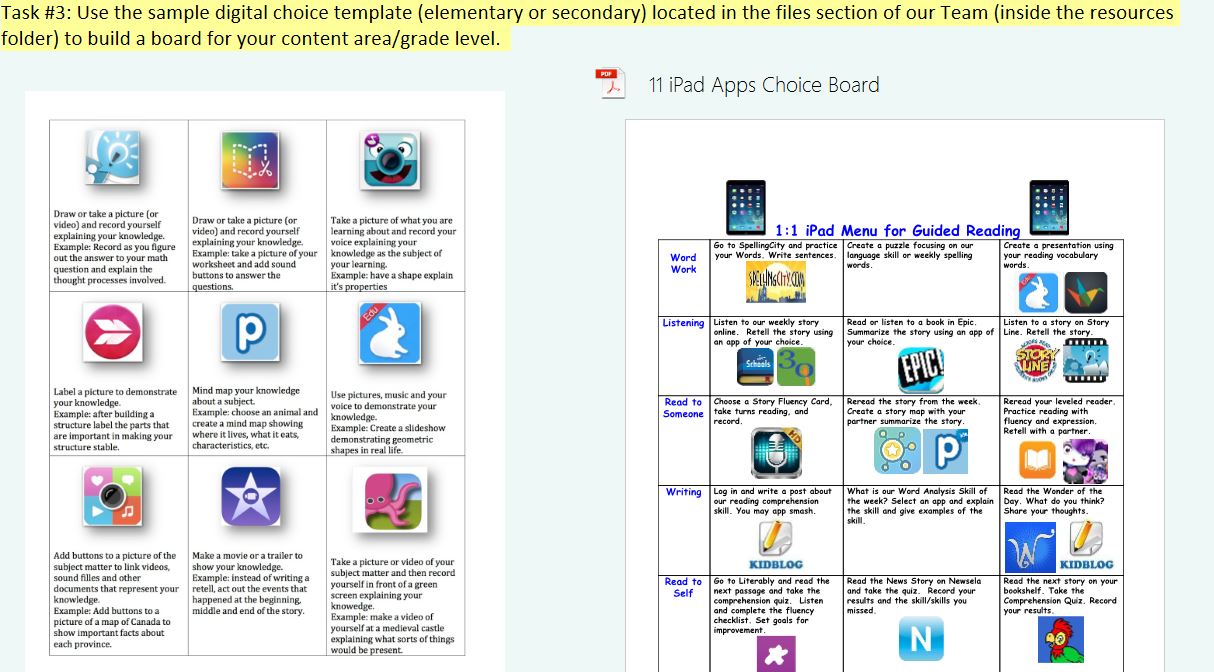
Choice #4: Choice Board Gallery Walk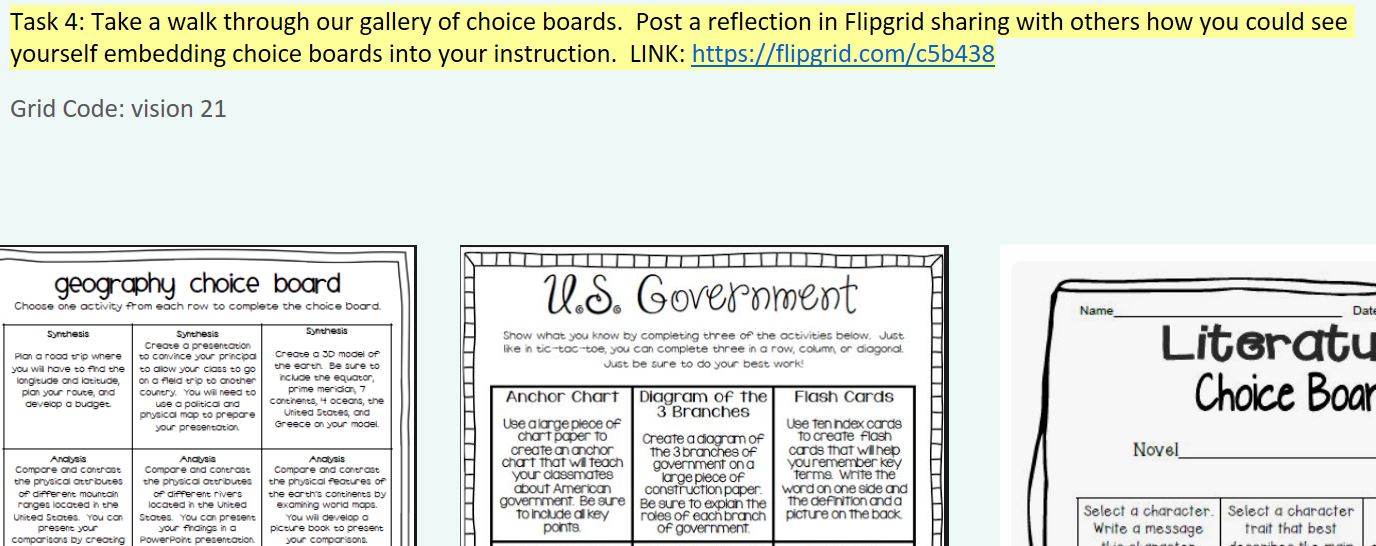
Choice #5: Video Resources
Choice #6: Alternative Options for Choice
Choice #7: Content Delivery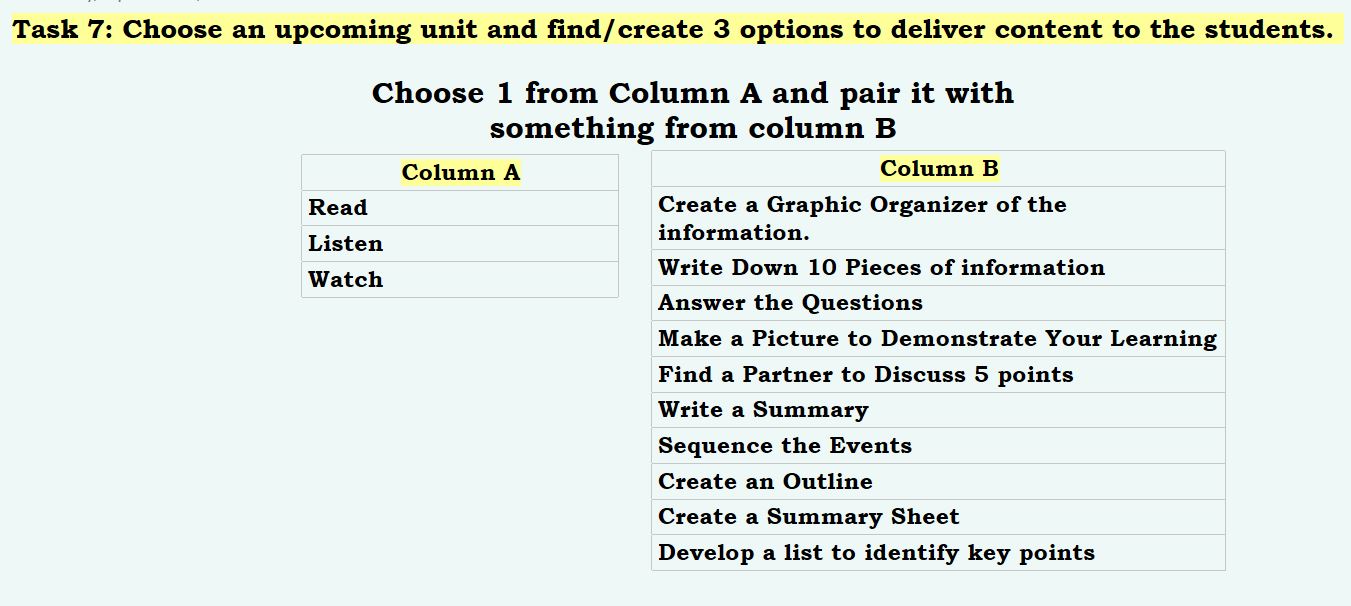
Choice #8: Practicing Content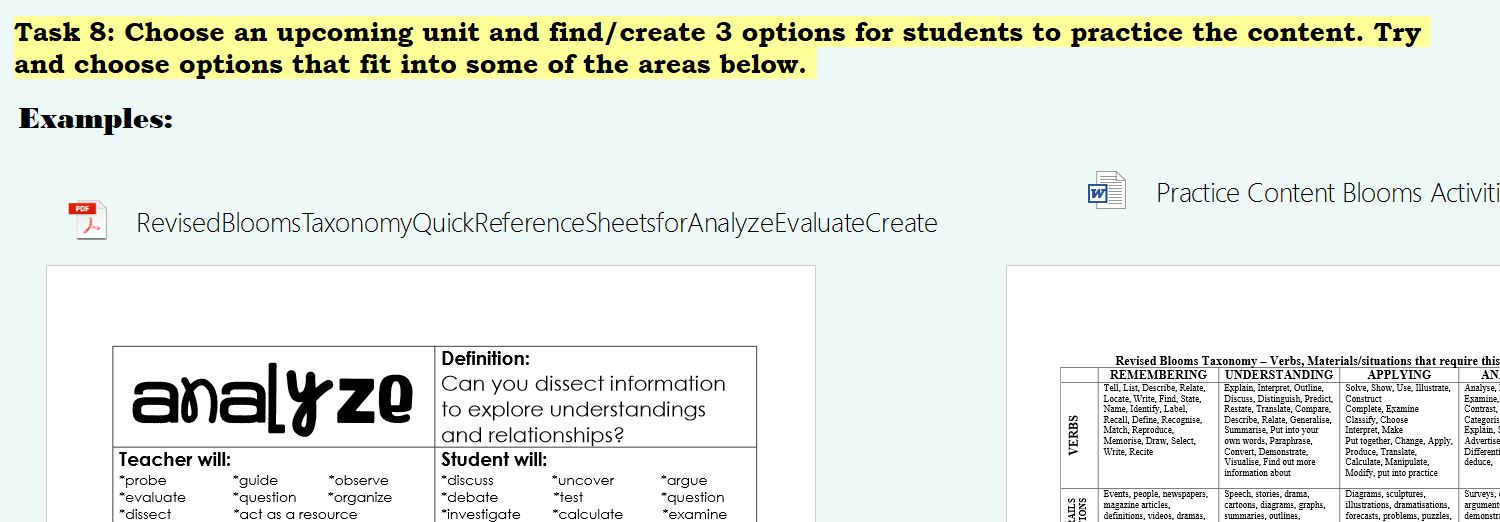
Choice #9: Assessment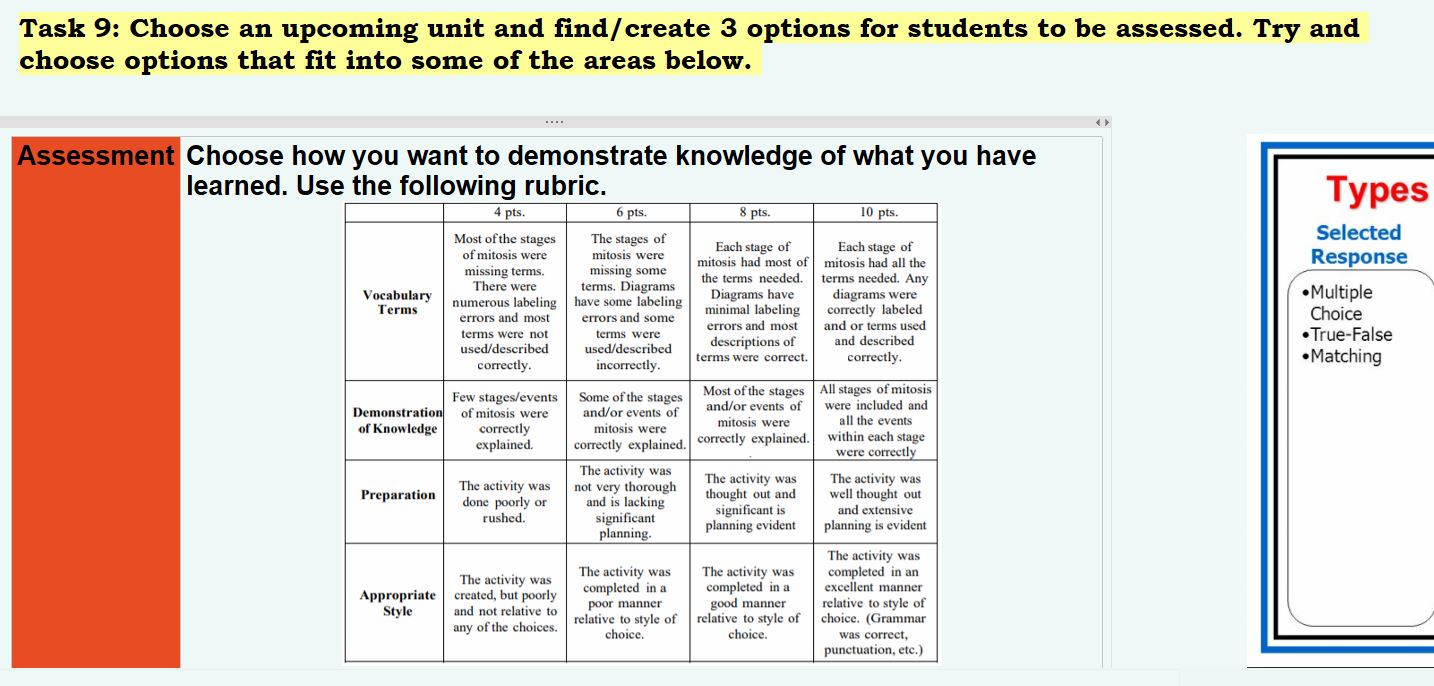
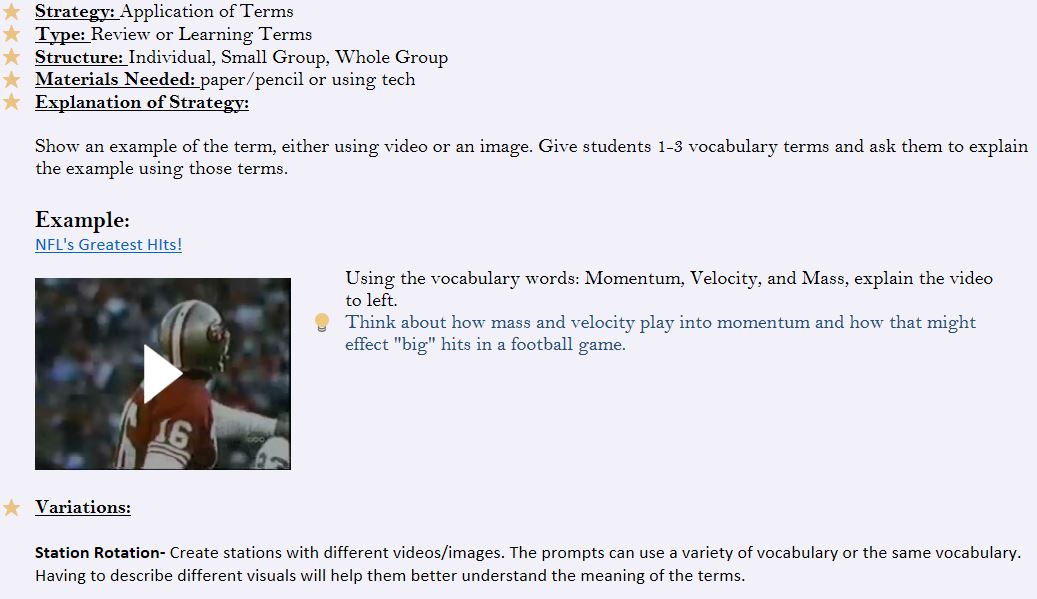
For the month of September, our Vision 21 meeting focused on critical vocabulary strategies. We chose this topic because no matter the grade level or subject, the understanding of vocabulary is going to be critical to student's learning. Many of the strategies presented come from Marzano's research. We used a station-rotation model to practice each vocabulary strategy. Groups of 4-5 rotated through the 6 stations. They each had 5 minutes to complete the strategy. Three of the stations were manned by myself, @J_Bimmerle and @AlcornMeghan. This helped us explain some of the stations that needed more specific directions. After each group had a chance to go through each station, we took time to reflect on the strategies presented. We think this is one of the most critical parts of the PD. Teachers can share out what strategies they think will work for their students, parts of the strategies they think won't work, or other variations of the strategy. The teachers are then given an adequate amount of time to look at their curriculum documents to see if there is a place to work some of the new strategies into their lesson plans. Strategy #1: Frayer Model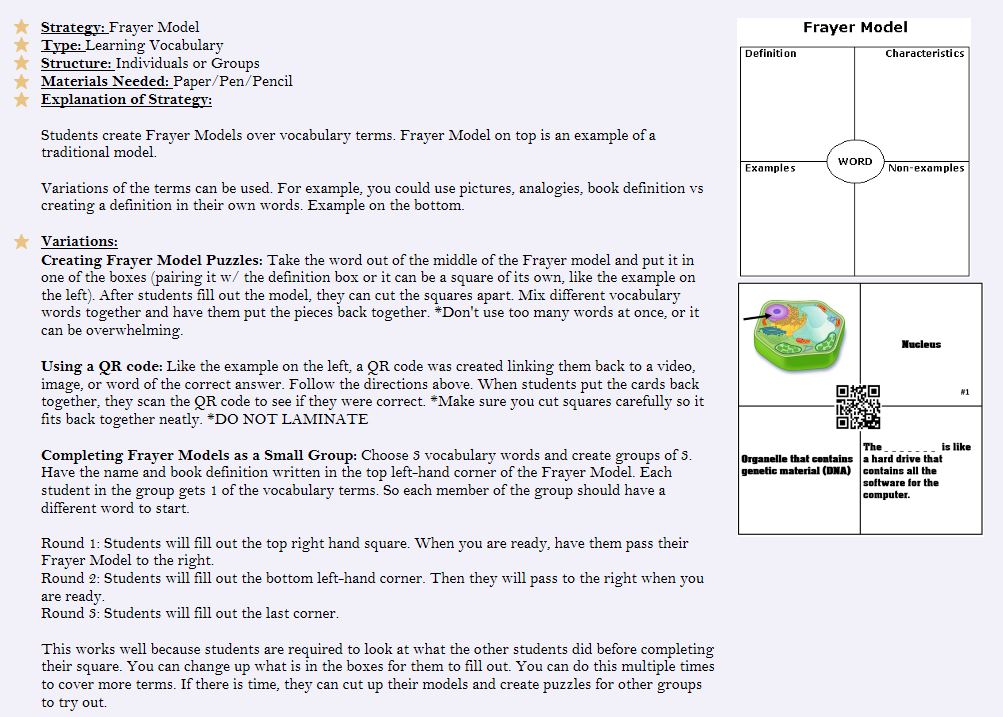
STRATEGY #2: Slap Card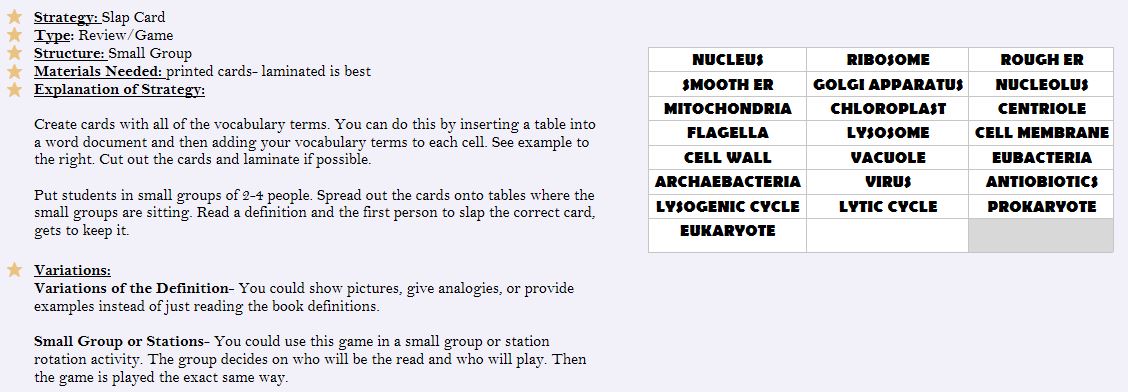
STRATEGY #3: Word Clouds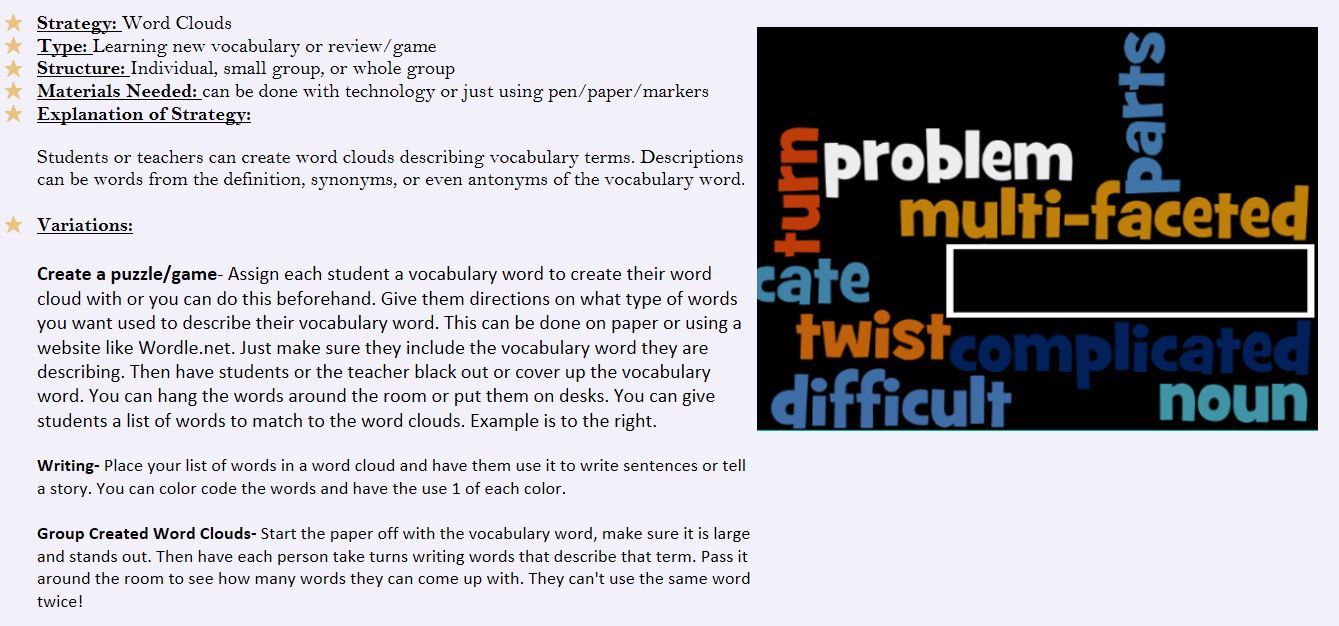
STRATEGY #5: NON-LINGUISTIC Representation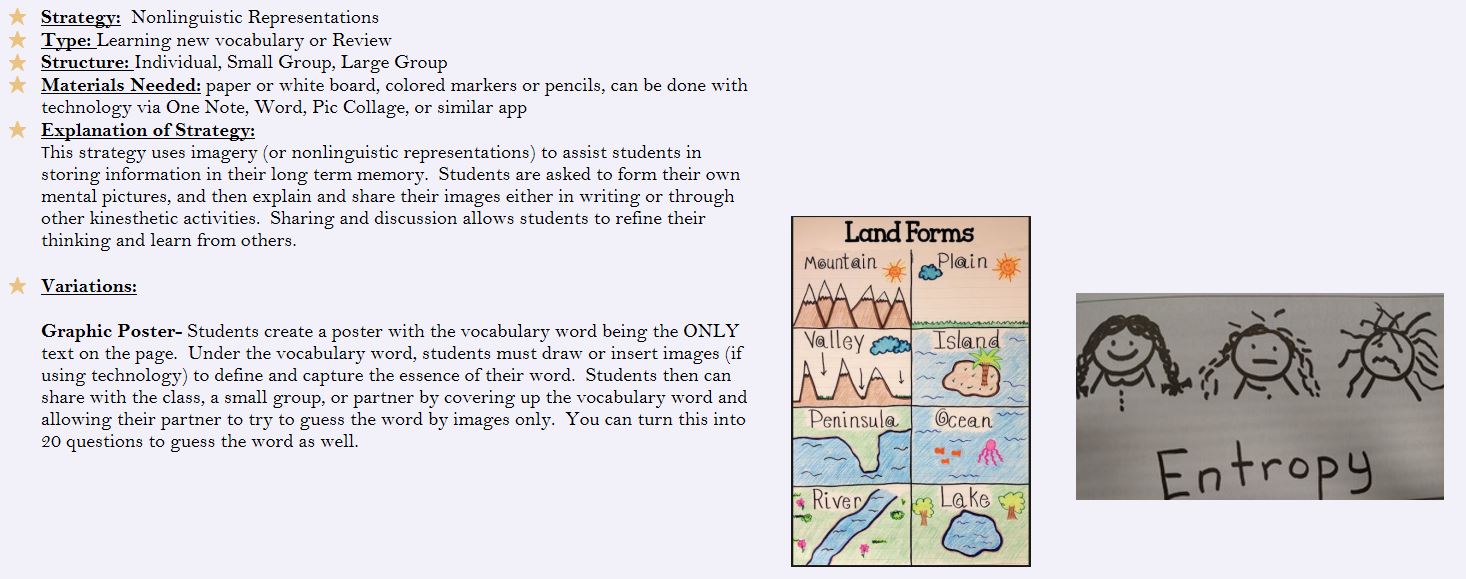
STRATEGY #6: Odd One out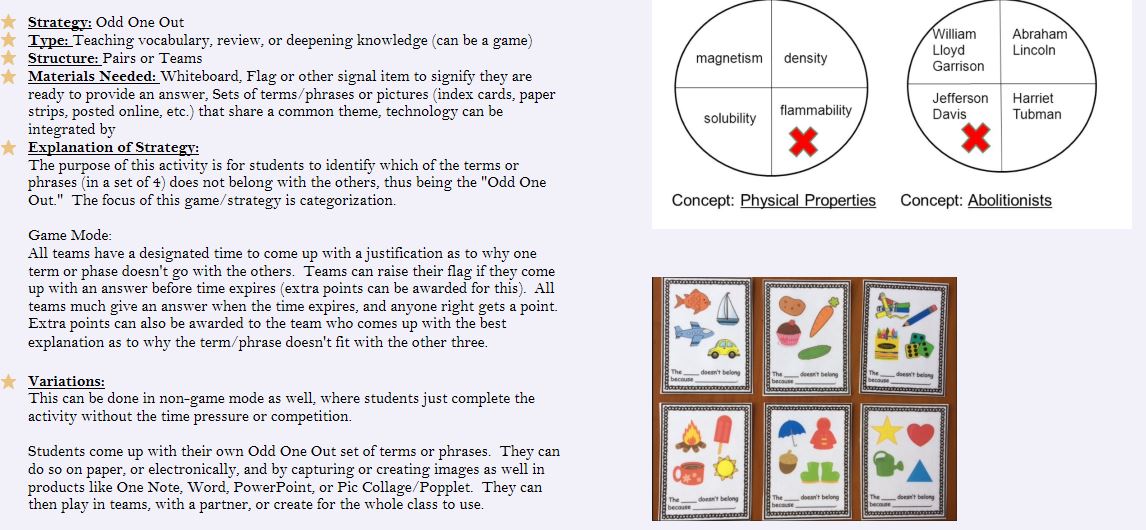
I am pretty sure we have all heard this phrase, "Teachers are the worst students." It usually comes after a long day of professional development and teachers have been packed into a room after a long summer away, and they are asked to listen to some person as they talk about education and how it should look in their class. What's the result of these days?
But I think the saying should be, "Teachers are students."
1. Move away from the PowerPoint. For everyone's sake, don't lecture from a PowerPoint (or Prezi or Google Slides). Death by PowerPoint is a real thing, you have to change it up! You can't preach moving away from sit-and-get, and then have your teachers sit and listen to you talk. I KNOW THIS IS HARD! So, how do you think teacher's feel when they are trying to plan a lesson that doesn't involve lecture and PowerPoint? Be a model. A simple way to get started is to use something like Padlet. Padlet allows them to make comments as you move through the information and ask questions, like a back channel. It is simple, but effective in getting teachers more involved in the discussion. Here is an example of using padlet for a presentation: https://padlet.com/mtownsend11/8mfzudlpn6k2 2. Give teachers time to play. If you are introducing a new piece of technology, give the teachers time to get logged in and play around a bit. You are going to have teacher's at different levels of technology prowess, and so some will need more time than others. Also, if you want them to listen to you, then they need to have gotten their exploring out of their system. 3. Let them DO. I am hoping to do some PD with my teachers at the beginning of the year on moving away from the worksheet mentality. (That will be another blog post). But I don't want to just tell them how to do it, I need to get them engaged in creating their own reasons. I won't make a PowerPoint that has all the reasons, I will have them come to those conclusions themselves. They will complete the worksheet, questioning techniques will guide them to find the reasons why it doesn't work, and then they will create the alternatives. After all, if it is their idea, they are more likely to get on board. 4. Know your audience. To make it relevant for teachers, you need to know your audience. Certain groups of teachers have tendencies that others don't. I have found that secondary teachers are more competitive then at elementary level. Maybe because there are more coaches? Who knows, but adding a level of competition tends to get them more engaged. Another example; once a 6 weeks, I meet with our CTE teachers and discuss the use of technology in their classrooms. These teachers are a different audience than our core teachers. I have to tailor my teaching to them. I need to show them tools and instructional practices that reach a wide-range of groups. Some of these teachers have 4 preps. They don't want to learn something that has too narrow of a scope. 5. Be funny, up-beat, and wear your failures. When you stand in front of a group of teachers and tell them all the ways they can change their classroom, it is off-putting. You will have lost them before you ever started. Win them over, let them know you have been in their place, talk about the failures you made and still make, be relevant to them. I say this because when I first started my job as a Digital Learning Specialist, people didn't know me, and I wasn't relevant to them. Most thought I was a 22 year old girl, straight out of college, and had a major in some sort of technology. They didn't know I was a 30 year old, ex-biology teacher and softball coach with 9 years of teaching experience under my belt, and had some of the same failures that they had. They didn't know my first year of teaching was a complete an utter disaster. I was 21 years old, pregnant, and teaching juniors in high school sex education. Can you imagine?! I know now, when talking to new teachers, that is my in. 1st years don't get much worse than that. I don't have all the answers, not even close. But in 1 year as a Digital Learning Specialist, I have learned the things mentioned above. My sessions with teachers I think have only improved since day 1 and it is because I made some changes. Teachers are human. They have the same wants and needs as our students. They don't want to be bored or told what to do. They want to learn from someone who is relevant, who guides them to create their own ideas, and keeps engagement at the forefront. I don't have all the answers, not even close. But in 1 year as a Digital Learning Specialist, I have learned the things mentioned above. My sessions with teachers I think have only improved since day 1 and it is because I made some changes. Teachers are human. They have the same wants and needs as our students. They don't want to be bored or told what to do. They want to learn from someone who is relevant, who guides them to create their own ideas, and keeps engagement at the forefront.
|
AuthorFollow me on Twitter @Mer_Townsend Archives
April 2018
Categories
All
|
||||||||||||||||||||||||||||||||||||||||||||||||||||||||||||||||
 RSS Feed
