|
I love Dotstorming and believe it is a highly underutilized app in education. Dotstorming.com is free and easy to use, which are two qualifications for me to even give it a look. It is similar to padlet, but I think it adds a level because of the ability to rank and vote on submissions. THIS IS NOT A TUTORIAL! It is sooo easy to use, so here is a link to learn more TUTORIAL. Below you will find examples and ideas for using it in your classroom or school! General instructional strategies
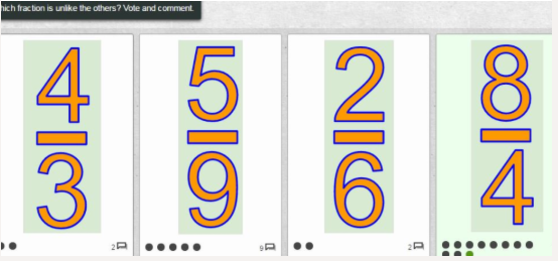 Choose the Item That Doesn't Belong- Just as it says, you place 4 items on the board and students vote on which item doesn't belong. Comment section can be used for students to explain why they chose it. AdministrationEdCamp Style Learning - creating sessions that teachers are interested in can be quite a pain sometimes. Dotstorming can be used to gain insight to what the most popular sessions are. Create a board and have teachers create cards with what they are most interested in learning. Then have the group vote on their top 3 sessions. Use that data to create sessions that will cater to your staff's needs. 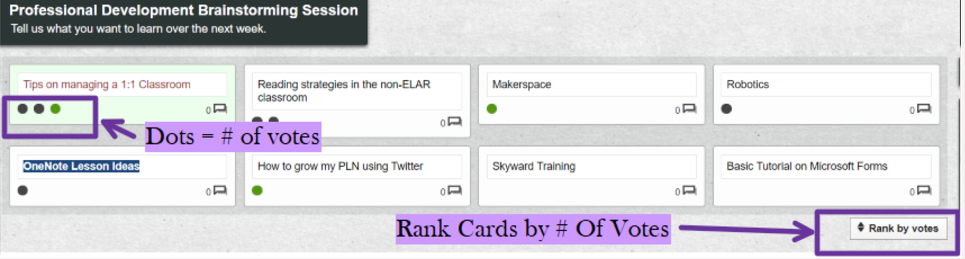 Feedback- Maybe you are trying to put into place a new calendar or rules about behavior...perhaps it is as simple as picking a type of meal for a luncheon. Put your options on different cards and let the staff vote on their favorites. Dotstorming defaults to 3 votes per user but you could change that to more or less. Social studies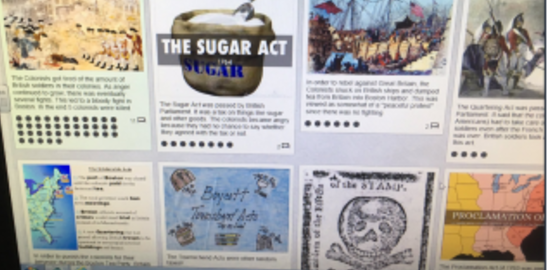 What's the cause? Social studies has so many areas where cause and effect are discussed. Use the Dotstorming board to gather ideas about what students think caused _____. Have them post their ideas and vote on who had the best explanation and ideas. My favorite example of this is from @BerTechR3 who had his 5th graders vote on what they thought was the biggest cause of the American Revolution. Alternate Endings- The use and study of timelines plays a roll in every history classroom. But what if events happened a little different, would the outcomes be the same? Create a scenario and have your students decide what the new result would be. They can create a card and use text and images to come up with their alternate ending. Then comment and vote on which is the most plausible or creative. 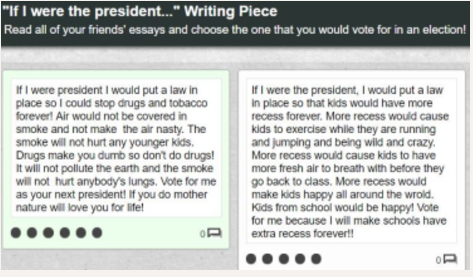 If I were... Love this idea from @Brit_Horn_IT. I think it could easily be used for ELAR or Social Studies. Students wrote about what they would do if they were president and then the kids voted on the best ideas. ELARWriting- Use Dotstorming for peer feedback. Learning how to write a thesis statement or use description to create more in depth sentences? Have students write their samples on the card and students can choose who did it best or leave comments to provide feedback. Textual Evidence- Pick a topic/theme/character that you want students to find textual evidence for. Students then choose the quote that they think best describes your topic and create a card. Then the class votes on who chose the best quote and explain why. Visual Representation- Students choose image that best represents character or themes. They choose the image and explain why. Then students choose which had the best representation. math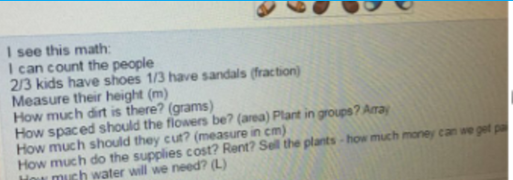 Creating Different Ways to Display a Math Problem- Give students a math problem and have them create alternate ways of showing the math problem, whether that is through images or word problems. Student can vote on the most helpful or creative examples. Stacy Falconer @The8Techdudes shows a great example of how students read math problems and show their thinking using images. scienceLabs- Use Dotstorming to collect information for your lab. Student can come up with their hypothesis for an experiment and the group can pick which they think is most likely. Students can upload data/graphs collected from an experiment. Conclusions can be written and commented on as well. Some of my FAVORITE TWEETS!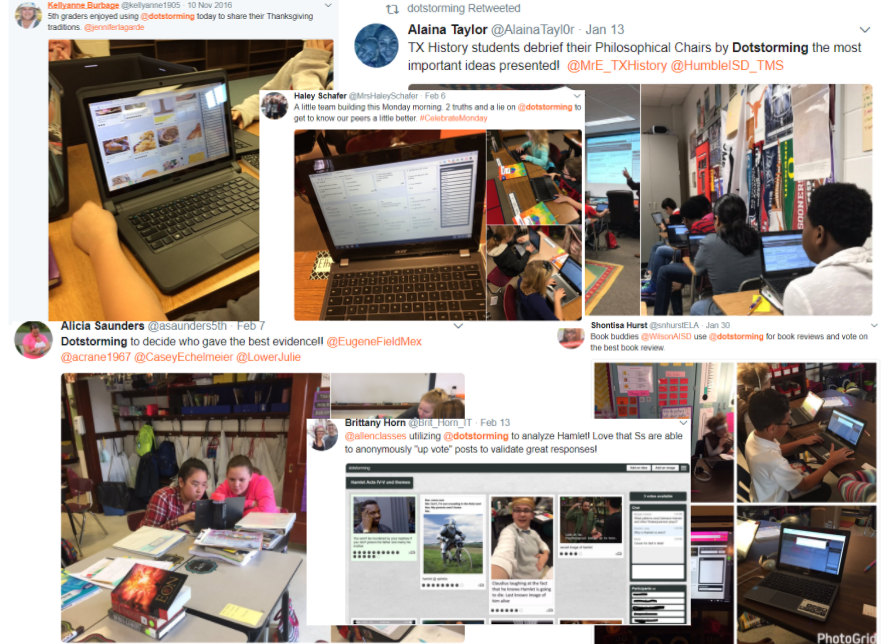
0 Comments
 Tip #1: Let Your Kids Get ComfortableDepending on what level you teach, this may or may not be as big of a deal. I am at the High School level and found that those kids were not comfortable with being on video and talking to their peers. I know.....I was confused by this too. But you use Snapchat all the time? How is this any different? Well, apparently it is. Whether we understand it or not, we need to give kids time to be comfortable and offer options for those that are not. #1- Start with a question that is NOT related to your content or what you are teaching. Let them play around. Ask them something they can relate to immediately and taps into something they want to talk about. Just get them talking. You can find some fun prompts here by @TxTechChick #2 Give them a shorter time limit. I like the shorter time limits anyway, I think students and teachers are more likely to listen to a response if it is shorter. So set the time limit to 30 seconds. But more than anything, if students know they only have to talk for a small amount of time, they are going to get less nervous and feel more like they can "knock it out."  #3 Allow them to be off-camera during when they film and take selfie. My hope is that all teenagers feel confident about themselves and want to show their voice and their face. That isn't the reality. We need to give them space and time to gain that confidence. Let them video the ceiling, the wall, a stuffed animal, whatever it is they want, and have them focus on what they are saying instead of what they look like. I mean, at what point, we had a kid wear a mask. But his answer was brilliant! 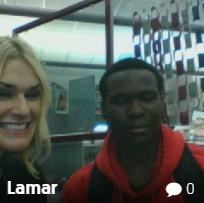 #4 Get in there with them! Teachers, model this confidence! Sit with them in the video and help ask the questions, like an interview. Have a conversation. Turn the selfie into a groupie! Tip #2: Create a HashtagThe government teacher Maci Newsom (@macinewsom )and I had created grids for students to talk about current policies during Trump's 1st 100 days. The hashtag idea grew from this project. We also used it with English classes (follow @mrsbutler209 ) who were studying The Monkey King, except they created a subject line for their picture. Students created a hashtag that described what they were going to be speaking about. They wrote it on a piece of paper and held it up during their selfie. This allowed students to have an idea of what the video was about before clicking on it. It also helped the shy kids feel more comfortable, as it took the place of their face in some cases. Tip #3: Give them More TimeHowever long you think it will take them to make the videos, it will probably take more. Now, this might not be true if you have done this a couple of times already, but the first few times it will. Many teachers think, oh they will record it once or twice.....good chance they will record it 4 or 5 times. But that's ok! The more they record, the more they retain. 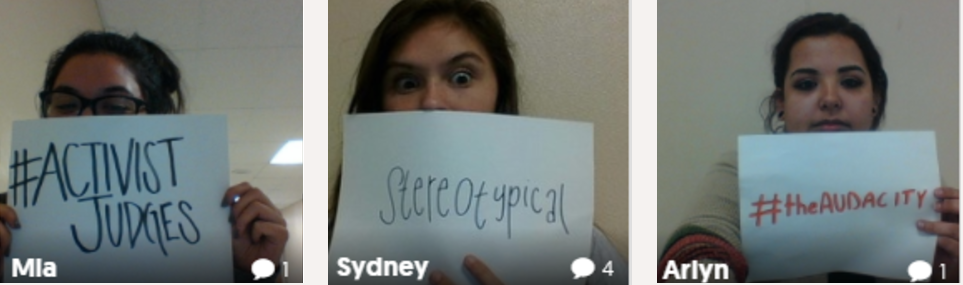 Tip #4: Encourage the Use of PropsHow many of us teachers just stand and talk? Not many. We are either writing on a whiteboard or demonstrating using some sort of prop. It can be uncomfortable and sometimes not as effective. Encourage your students to use props in their video. In our chemistry classes (follow @kaytlin_black ), our students had to explain one of the Gas Laws. Many chose to use a whiteboard or smart board to help demonstrate their knowledge. The videos were much better for the students who chose to write and demonstrate vs those students who just explained. 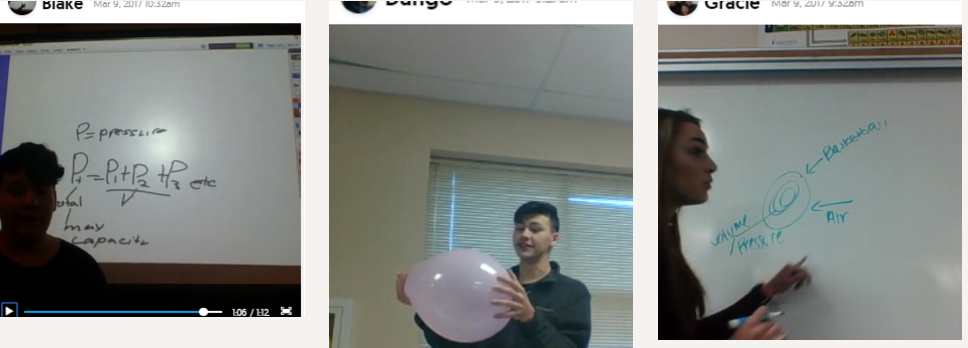 Do you have any tips for the new Flipgridder? comment below! |
AuthorFollow me on Twitter @Mer_Townsend Archives
March 2019
Categories |
 RSS Feed
