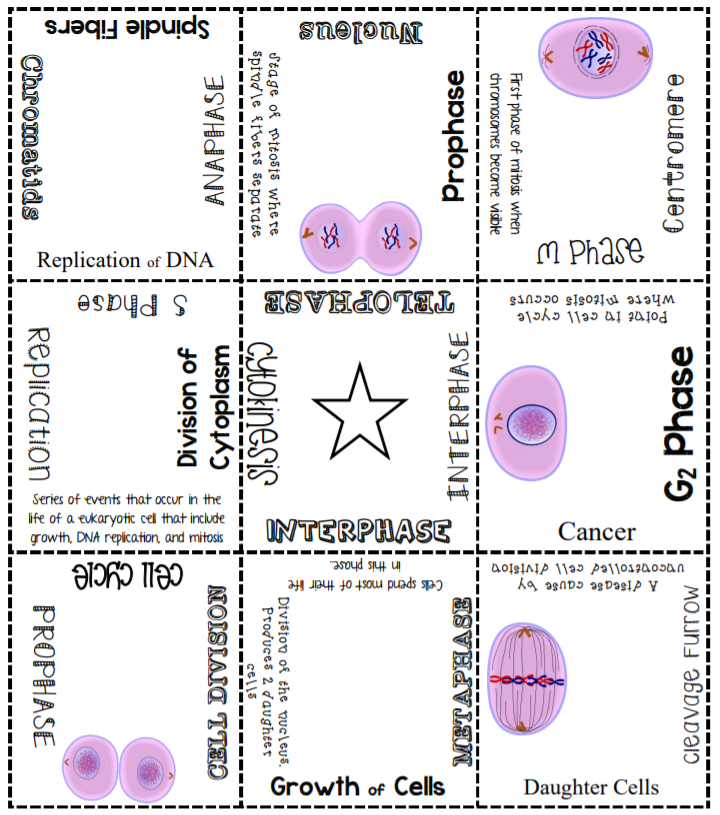
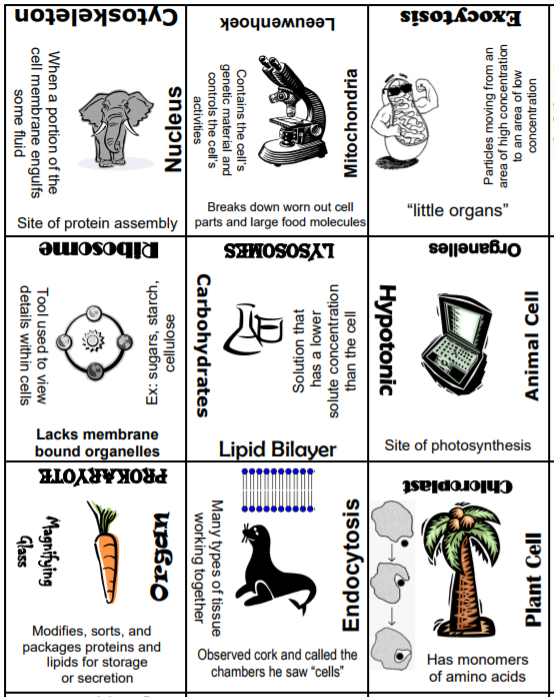
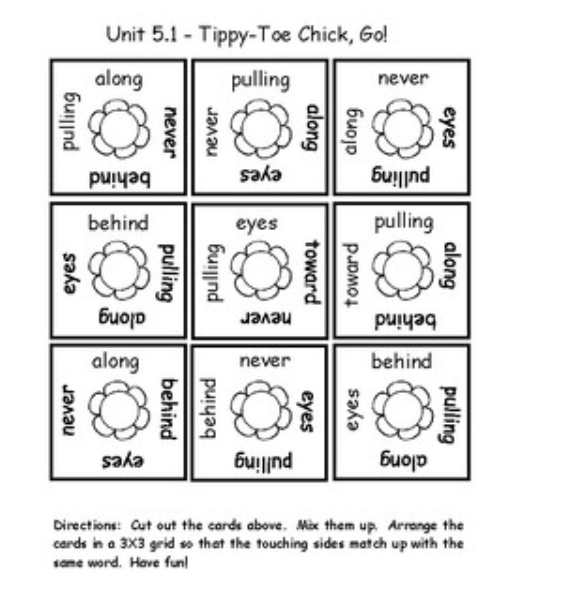
What is a 3x3 puzzle?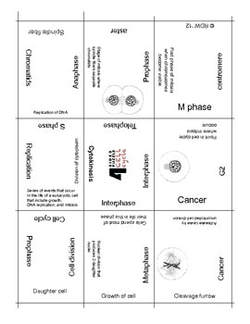 By no means is this my idea, I found it 3-4 years ago when I was teaching biology. The first one that I ever saw was over Mitosis and the Cell Cycle. I am not sure who the original creator was, you can now find it on many websites. Here is what it looks like. To play: 1. Cut out the pieces. Laminate if you can. 2. Students then try to match up the correct definitions and vocabulary terms. The middles all have to match in order to solve the puzzle. The outside words or definitions are not used but add another element to make the puzzle harder. I think the reason I love these so much, is it is super simple and it is a great way to engage students when learning or reviewing vocabulary. creating a 3x3 PuzzleI have created a template in PowerPoint that serves as an easy way to create puzzles for any unit. If you would like a copy, click HERE and download the PowerPoint to edit as you wish. If you would like to make your own template, I simply created a 3x3 table and then added text boxes on each side of the boxes. Then just rotate the text boxes to make them work for the inside and edge lines. Get students InvolvedI think the greatest asset of this puzzle is when students are involved in making them. Share the template through OneDrive or OneNote and allow students to create their puzzles based on the content. This would be a great review activity. Then print them, cut them out, and let the students trade with other groups. Use them in stations, as part of a choice menu, for review, or for even introducing new vocabulary terms. Have students use pictures instead of just definitions. Create math puzzles with problems and answers. This puzzle is extremely versatile! Examples
0 Comments
Here is the 2nd part of the "Reworking the Worksheet" series. Again, we look at what the goal of the worksheet was trying to accomplish and seeing how it can be reworked into a more engaging, challenging, and creative version. For this, we will look at worksheets that aim to address comprehension and summarizing concepts. #2: Goal of the Worksheet is Comprehension or Summary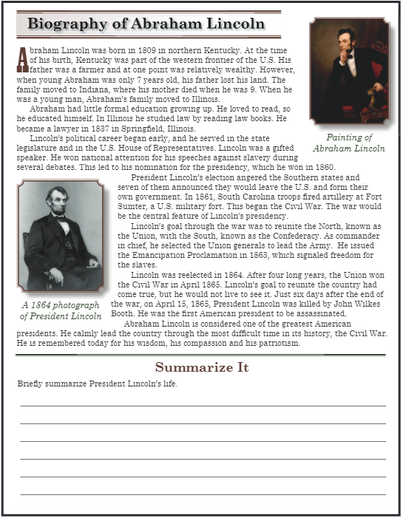 Here is a look at a typical reading comprehension worksheet. Students read teh passage and summarize what they have read. What it doesn't do.... Provide differentiation for students on different reading levels. Let students be creative. Forgets to be relevant. So let's fix it! Differentiation: Instead of handing out a paper copy, make an electronic copy and let the apps help your students! There are so many amazing apps out there that can help learning who struggle with reading. Here are a couple:
Creativity: Get creative! Let your students use different mediums and apps to show comprehension. Paper worksheets only allow for written demonstration of knowledge. Let them use video, audio, and other web apps to demonstrate and show off their creative thinking.
Be Relevant: Let's get real.....summarizing a paper in 5-7 sentences isn't a relevant assignment. So why is this skill important? Everyday we go through life trying to make sense of what we see, hear, and read. Being able to identify what is important and irrelevant could not be more important in a world that is bombarded by media at every turn.
I know, I know......worksheets are always getting bashed. But here me when I say, there are some really good reasons, not to use the worksheet model anymore. So I plan on offering simple ways to "rework the worksheet" that are feasible for all teachers and have a positive impact on students. First, we will look at the goal of the worksheet and and ways to revamp to better meet these goals through the use of technology. #1 - Goal of Worksheet is to Practice Typically, when I ask teachers what the goal of their worksheet is, the answer is usually to PRACTICE. Students need to practice a particular concept in order to ultimately master it. The problem with using our typical worksheet model for practice, is that it fails to: 1) Provide timely feedback and 2) fit the needs of learners at different levels. So how can we still allow our students to practice more effectively? Take a look at the worksheet below. The main goal of this worksheet is to practice completing math problems using the order of operations. 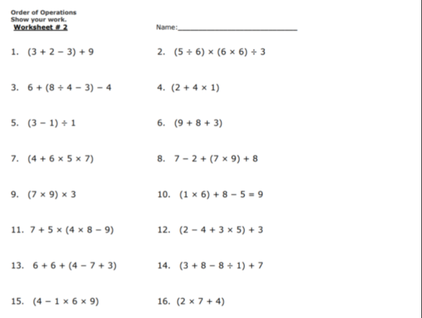 *If feedback is not immediately given (and let's get real!) teachers are not going to check/grade the assignment until at earliest the next day, and by then it is too late. Students are going to be on different levels of mastery before they even begin the worksheet. At this point it is one-size fits all. So let's fix it. I used Microsoft Forms (Google Forms will work as well) to recreate this worksheet with our 2 problems in mind. The students are still practicing their order of operations, but this time they are receiving feedback as they move through each question and branching of the questions allows our lower-level learners to practice ore of the basic concepts, and our higher-level learners are moving on to more challenging questions. Go ahead, try it out! CLICK HERE (Be sure to plug in some wrong answers to see how the branching works!) *This form does not walk through ALL problems, but does give you an example of feedback and branching. 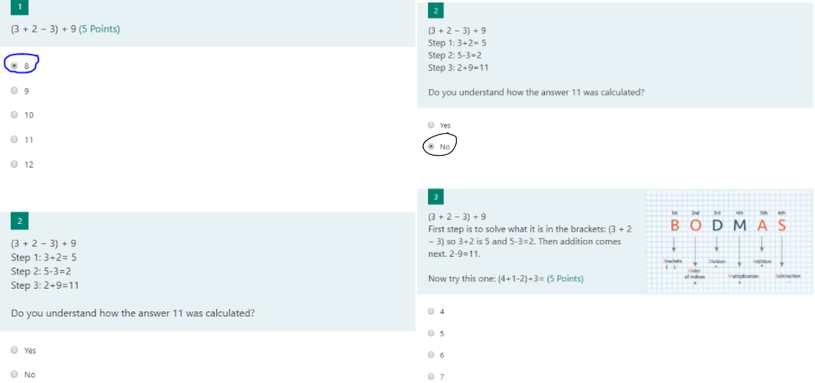 FEEDBACK AND BRANCHING: The first problem was incorrect. So the form took the student to Question #2. Question #2 then walked the student through how the answer was calculated. It then asked the student if they understood. If the student select NO, then it would take them to another question where the the problem was looked at with more detail. An image was inserted to help the student better understand the concept. They would then complete the SAME question as the student who selected YES, but with more guidance. 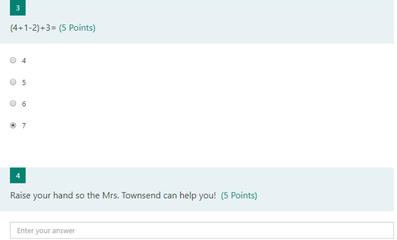 TEACHER FEEDBACK! This time, if the student continued to miss the questions, they would be prompted to raise their hand so the teacher could come over. This gives the teacher IMMEDIATE feedback into who in the room is really struggling with the concepts. While the other students, who are not struggling, do not have to slow down in their work while you help the other students.  MORE FEEDBACK OPTIONS! Don't forget the power of video. You can add video into your questions to give students more ways to receive feedback. The written step-by-step instructions may not be enough. So teachers can utilize the video features in forms to provide more effective feedback. 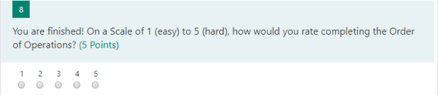 FINAL FEEDBACK OPTION: Last, but not least, don't forget to get some informal feedback for how your students are feeling about the particular lesson. Use this to help guide your instruction the next day. Now, wasn't that AMAZING?! Can your worksheet offer all of this to students? No. Utilize branching features in forms to let students work through a path that best fits their individual needs. Use questions to embed feedback and keep their learning on track. No student likes to find out they did 10 questions wrong, after they have completed an entire worksheet. Get ahead of the problem and provide timely feedback so mistakes are corrected as they move through the problem sets. I believe these 2 features alone, will help you see major progress in the learning that you see with your students. Would love to hear your feedback! Hit me up on Twitter @Mer_Townsend and let me know what you think! |
AuthorFollow me on Twitter @Mer_Townsend Archives
April 2018
Categories
All
|
 RSS Feed
